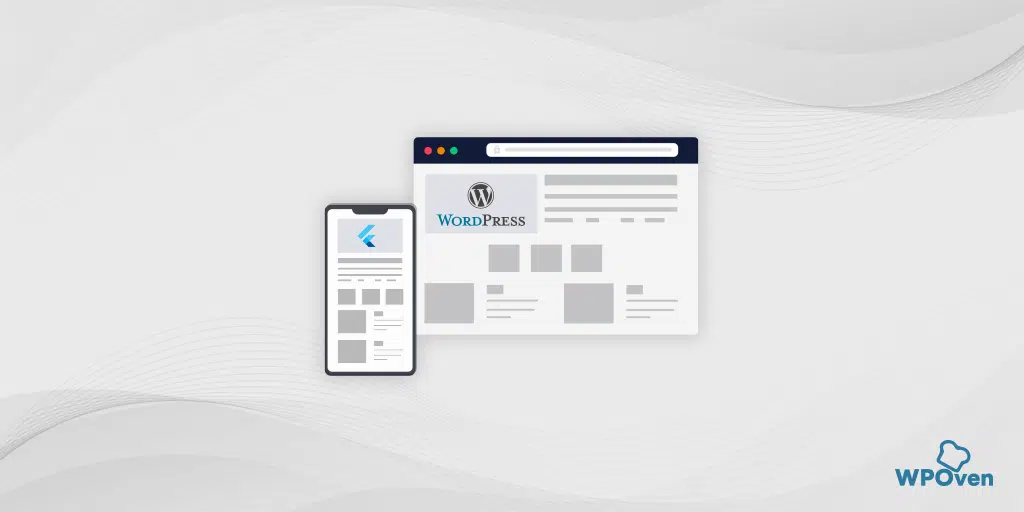
Flutter App for any WordPress Website can be a game changer for your online presence. Just imagine, having a sleek, high-performance app that runs flawlessly on Android and iOS, all from a single codebase.
Not only does it save your time and money but it also ensures your users get a seamless, engaging experience whether they are online or offline.
Plus, with features like push notifications and access to native device functions, you can keep your audience connected and coming back for more.
In this blog, we’ll dive into How to create a Flutter App for any WordPress site in a step-by-step process. So without any further delay let us get started on creating an app that truly brings your WordPress site to life!
Why you Should / Shouldn’t Create a Flutter App for any WordPress site? (Advantages and Disadvantages)
Before directly hopping into creating something new, one should always consider both sides of the coin, i.e., the advantages and disadvantages, so that you are prepared for any issues you might face in the future.
Advantages/Benefits of Creating a Flutter App for Any WordPress Site
- One App for All: With Flutter, you build one app that works on both Android and iOS. This saves you time and money since you don’t have to create separate apps for each platform.
- Better User Experience: Flutter lets you design beautiful and responsive UIs, making your app look and feel great. It’s a step up from a mobile website.
- Fast and Smooth: Flutter apps are super-fast because they run as native apps. This means quicker load times and smoother interactions for your users.
- Works Offline: Users can access your content even without the internet, which is super handy for when they’re on the go.
- Stay Connected with Push Notifications: Easily send push notifications to keep users updated on new posts, news, or important alerts, which helps keep your audience engaged.
- Use Device Features: Tap into features like the camera, GPS, and sensors to add more functionality to your app.
- Consistent Branding: With an app, you can ensure your branding is spot-on and consistent, giving users a cohesive and professional experience.
- Make Money: Apps offer more ways to monetize, like in-app purchases, subscriptions, and ads, which can be tougher to manage on a mobile website.
- Better Security: Apps can offer stronger security for things like user logins and payment info, giving your users peace of mind.
- No Distractions: Apps provide a more focused experience compared to mobile websites, which can have browser tabs and other distractions.
- Quick Development and Updates: Flutter’s hot reload feature means you can see changes instantly without restarting the app, making development faster and easier.
Overall, creating a Flutter app for your WordPress site can make your digital presence stronger and more engaging, providing a top-notch experience for your users and helping your content shine.
But like anything else, the coin has another side too. Apart from the above advantages, you might face some disadvantages such as:
Disadvantages/Limitations of Creating a Flutter App for any WordPress Site
While creating a Flutter app offers many benefits, there are some disadvantages to consider as well:
- Limited Third-Party Libraries: Compared to more established frameworks, Flutter has fewer third-party libraries and packages available. This can sometimes mean more custom development work.
- Large App Size: Flutter apps tend to have larger file sizes compared to native apps, which can be a drawback for users with limited storage space or slower internet connections.
- Learning Curve: Developers need to learn Dart, Flutter’s programming language. While Dart is relatively easy to pick up, it’s still an additional skill to learn.
- Performance Issues on Older Devices: Although Flutter generally performs well, some older devices may experience slower performance or increased battery usage compared to native apps.
- Less Mature Framework: Being relatively new, Flutter might lack some advanced features and stability that more mature frameworks offer.
- Platform-Specific Features: Implementing platform-specific features (like certain Android or iOS functionalities) can be more complex and may require writing native code.
- Limited Web Support: While Flutter is expanding its web support, it’s still not as robust as its mobile support, which can be a limitation if you’re looking to build for multiple platforms.
- Integration with Existing Apps: Integrating Flutter into an existing app can be challenging, particularly if the app is already large and complex.
- Community and Support: Although growing rapidly, Flutter’s community and support resources are still smaller compared to more established technologies like React Native or native development.
- Frequent Updates: Flutter is under active development, which means frequent updates. While this is generally positive, it can sometimes introduce breaking changes or require continuous learning to keep up.
- Testing and Debugging: Testing and debugging can sometimes be more complex in Flutter, especially when dealing with platform-specific bugs.
Despite these disadvantages, Flutter remains a powerful tool for developing cross-platform apps, and many developers find its benefits outweigh these challenges.
Creating Flutter APP for any WordPress Site RoadMap
This is what Roadmap we are going to follow to create a Flutter App for WordPress.
Step 1: Get Familiar with Flutter: First things first, you have to completely understand what Flutter is all about. Flutter is an amazing tool that helps developers to make some great apps. It uses a special language called Dart and comes with lots of features that make apps look and work great. Before we get started, you must go through its documentation, tutorials, and guides to get the hang of it.
Step 2: Strategize Your App Structure: Now, in the next step, you have to figure out and make a strategy about what exactly the app needs to do. For example, you need to decide which parts of the WordPress website you would like to include in the app.
Also, do not forget to consider about how users will use the app and what it should look like. It would be great if you draw a rough sketch of the screens and layout, that can help you to visualize your ideas.
Step 3: Choose How to Convert: Choose a particular method through which you can turn your WordPress site into an app:
- Either start from scratch using Flutter, which has its benefits like total control but time time-consuming.
- Or, You can use special plugins to speed up the process by integrating WordPress content into our app.
- Another option is to use a setup called “Headless WordPress,” where Flutter manages how the app looks, and WordPress handles the content.
However, we are going to choose the method that better aligns with our project and skills.
Step 4: Set Up Flutter: Now, it is time to do the setup and for that, you need to install Flutter on your computer and set up your workspace. Once that’s done, you can create a new project for your app using Flutter’s tools.
Step 5: Bring in WordPress Content: If you are using a plugin or “Headless WordPress,” You’ll need to set up the Flutter app to gather data from our WordPress API site. We can use special tools to help us do this.
Step 6: Design and Customize Your App: We get to design how a Flutter app looks and feels. Flutter has a widget library that can help you create a replica of your WordPress site’s look and feel. Furthermore, you can add animations, buttons, and other elements to make it easy and fun to use on every screen size.
Step 7: Test and Improve: Before making it live in the world, you need to make sure it works perfectly. To do that, test it on different devices as well as emulators, and fix any problems you find. Flutter has debugging tools that can help you find and fix any bugs in your codebase.
Step 8: Launch Your App: Once you have finalized that everything is working perfectly, you need to submit it to the app stores for Android and iOS and let users download it. You just need to follow the rules and guidelines of the app stores, such as adding descriptions and screenshots.
So, why should you use Flutter for our WordPress app? Well:
- It saves time because we can make both Android and iOS apps from one code.
- Its real-time customization feature allows you to see any changes or updates you make instantly on the Flutter app.
- You can make the Flutter app’s UI look amazing with Flutter’s tools for designing cool stuff.
- Best of all, the Flutter app will work smoothly and quickly on all kinds of devices and screen sizes.
Now let’s begin the process.

Create Fultter APP for WordPress site (Step By Step Process)
Follow the given below steps that can help you to convert any WordPress Site into Flutter APP.
Step 1 : Setup your Flutter Environment
Setting up Flutter Environment is easy and very essential. No matter either you want to create an Android app or iOS, Flutter is available for almost all platforms. Let’s see how you can do that.
a. Choose OS: The first thing while setting up Flutter is to decide whether you’re using Windows, macOS, or Linux. Make sure it meets Flutter’s system requirements.
b. Download/Install Flutter: Go to Flutter’s official website, read the documentation and instructions carefully, and download the stable version for your OS. After downloading, unpack the files and place them somewhere on your computer.
c. Set Up Flutter’s Path: Add Flutter to your system’s PATH variable so you can use Flutter commands from any terminal or command prompt. It’s like having easy access to Flutter tools whenever you need them.
d. Install Support Tools Depending on your OS, you might need to install extra tools like Git or the Android SDK. These tools help Flutter run smoothly.
e. Check Installation Open a terminal or command prompt and type ‘flutter doctor’. This command checks if Flutter was installed correctly and tells you if anything is missing.
f. Choose IDE: For the App development, you will be required to have IDE either Android Studio or Visual Studio also installed on your PC.
Step 2: Create a New Flutter Project
You need to create a New Flutter Project using the Flutter CLI command line”
flutter create your_app_name
cd your_app_name
Enable Flutter for Web by using the following command:
flutter config –enable-web
Now, Create a web directory within your Flutter project by running the below command:
mkdir web
Step 3: Design the User Interface
Now you have to Create the user interface for your app using Flutter Widgets and libraries.
Retrieve data from the WordPress website by making HTTP requests to the WordPress REST API using the HTTP packages. ( Ensure your WordPress site has the REST API enabled. Most modern WordPress sites have this by default.)
Create a service to fetch data from your WordPress site using the REST API.
import 'package:http/http.dart' as http;
import 'dart:convert';

class ApiService {
  final String baseUrl = "https://your-wordpress-site.com/wp-json/wp/v2/";

  Future<List<dynamic>> fetchPosts() async {
    final response = await http.get(Uri.parse("${baseUrl}posts"));
    if (response.statusCode == 200) {
      return json.decode(response.body);
    } else {
      throw Exception('Failed to load posts');
    }
  }
}
Step 4: Display WordPress Content in Widgets
Display Data in Widgets:
- Use Flutter widgets to display the fetched data.
import 'package:flutter/material.dart';
import 'api_service.dart';

class HomePage extends StatelessWidget {
  final ApiService apiService = ApiService();

  @override
  Widget build(BuildContext context) {
    return Scaffold(
      appBar: AppBar(title: Text("WordPress Blog")),
      body: FutureBuilder(
        future: apiService.fetchPosts(),
        builder: (context, snapshot) {
          if (snapshot.connectionState == ConnectionState.waiting) {
            return Center(child: CircularProgressIndicator());
          } else if (snapshot.hasError) {
            return Center(child: Text("Error: ${snapshot.error}"));
          } else {
            List posts = snapshot.data;
            return ListView.builder(
              itemCount: posts.length,
              itemBuilder: (context, index) {
                return ListTile(
                  title: Text(posts[index]['title']['rendered']),
                  subtitle: Text(posts[index]['excerpt']['rendered']),
                );
              },
            );
          }
        },
      ),
    );
  }
}
Step 5: Perform Tests on Different Devices
To check if the app is successfully running, let’s test it on a web browser first. To do this enter the following command:
flutter run -d web
Similarly, to test on Mobile, use the following command:
For Android:
flutter run -d android
For iOS:
flutter run -d ios
Step 6: Optimize App UI and Layout for Mobile
Now you need to optimize the app’s user interface and layout to be more mobile-friendly. There is a chance that the UI might appear different on other devices or platforms, especially if you are utilizing a WordPress accessibility plugin.
Step 7: Make the App live
Do all the documentation and paperwork required for the app release on popular app stores like Google Play and the Apple Apps Store? Also, make sure you have thoroughly gone through their guidelines and implemented them in your app before the final release.
Once everything is finalized and you are sure everything is okay and ready, release/publish the app.

Some Essential things to keep in mind while Converting WordPress Site to a Flutter App
To make things easier, more straightforward, and faster for you, Flutter app development uses various packages to handle state management, routing, and other features.
These packages help simplify the mobile application development process by providing ready-made solutions that save you time and effort.
Here is a breakdown of these packages:
State Management
There are various popular Flutter packages available that can help you to manage app-wide state efficiently. These are:
- Provider: Provider is a popular state management solution in Flutter that uses the InheritedWidget mechanism to propagate changes in the state down the widget tree. It allows for a more efficient and scalable way of managing state across multiple widgets.
- GetX: GetX is a lightweight and performance-oriented state management solution that offers state management, dependency injection, and more. It’s known for its simplicity, speed, and ease of use.
- Bloc: Bloc (Business Logic Component) is an architectural pattern for managing state in Flutter apps. It separates the presentation layer from the business logic, making it easier to test and maintain complex app states.
- Riverpod: Riverpod is an alternative to Provider that offers more flexibility and fine-grained control over state management. It allows for the creation of scoped state containers and makes it easier to manage dependencies in Flutter apps.
- MobX: MobX is a reactive state management solution that automatically updates the user interface whenever the underlying data changes. It’s easy to use and well-suited for managing complex app states.
Depending on your project’s complexity, you can choose the one that best fits your needs. Using a state management package helps you organize and control the data flow in your app.
Routing
Good navigation and routing are essential for a smooth user experience. While Flutter has a built-in navigator, these packages make it easier to manage:
- Navigator 2.0: Navigator 2.0 is a new routing system introduced in Flutter that provides more flexibility and control over navigation. It allows for deep linking, bookmarking, and managing route transitions with greater granularity.
- Get (GetX): It’s known for its simplicity, speed, and ease of use. GetX provides a lightweight alternative to other state management solutions like Provider or Bloc.
- Fluro: It simplifies the process of defining and navigating between routes within your app. It provides a flexible and intuitive way to handle routing and deep linking, making it easier to manage the navigation structure of your Flutter application.
Using a routing package helps you define and manage your app’s navigation structure more efficiently, especially if you have multiple screens and routes.
Other Features
Flutter’s ecosystem has many packages for different purposes. Depending on what you need, you can use packages like:
- HTTP Requests: Use packages like
httporDiofor advanced network requests. - Image Loading: Use
cached_network_imageto efficiently load and cache images from your WordPress site. - Local Storage: Use packages like
shared_preferencesorSQLitefor local data storage. - Authentication: Integrate user authentication with packages like Firebase Authentication or OAuth.
By utilizing these packages, you can implement various features to your Flutter App with very little effort and also get benefits from the tools developed by the Flutter Community.
Conclusion
Creating a Flutter app for your WordPress site not only leverages your WordPress site’s potential but also enhances the user experience. Mobile apps have become trending nowadays, and they also help in collecting user data that can ultimately aid in optimizing your business strategies and increasing your success rate.
Flutter’s versatility combined with WordPress’s powerful features can help you achieve and deliver a smooth mobile experience to your users.
Just give it a try and implement a Flutter app for any WordPress site. No matter whether you are a pro developer or just a beginner, this blog will definitely help you build confidence to create an app and see a Spike in leads.

Rahul Kumar is a web enthusiast, and content strategist specializing in WordPress & web hosting. With years of experience and a commitment to staying up-to-date with industry trends, he creates effective online strategies that drive traffic, boosts engagement, and increase conversions. Rahul’s attention to detail and ability to craft compelling content makes him a valuable asset to any brand looking to improve its online presence.

